 |
|
 |
| |
Access Databases
Creation and Population
DATABASE CREATION
Launch Access from Windows, then choose File then New Database, specify
the path as H:\ipt\is\ then specify the File Name as yourname.mdb
and finally click on Ok. This will create an empty database container
for you to use as storage for your database objects.
TABLE CREATION
REFERENTIAL INTEGRITY
- Press the RELATIONSHIPS button,

then Add all three of the defined tables, then Close the Add Table
window.
- Point to SerNum in the Albums table, click and drag it on top
of the SerNum column in Tracks to begin the inter-table relationship
definition. Check Enforce REFERENTIAL Integrity
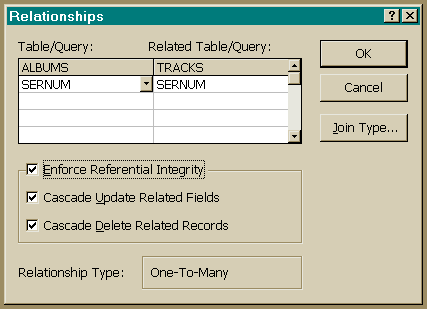
then Cascade Update Related Fields and then Cascade Delete Related
fields. Ensure that it is a One to Many relationship and then click
on Create.
- Repeat step 8 for SerNum in the Performers table.
- Drag the tables to resemble the diagram that follows,
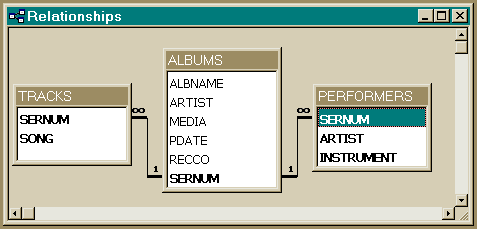
and then SAVE the definition into your Database container. Finish
up by closing the Relationships Window.
INSTANTIATION
- Access will allow you to enter tuples directly by hand into each
of the newly created table objects. To do this, DOUBLE-CLICK on
the newly created Albums table icon to open it. Add values to each
of the fields, pressing ENTER to move to the next. At THE END of
a row, Access verifies the data, If it is OK, it is automatically
saved in the table, and a new row prompt is offered. Attempt to
enter duplicate SerNum values in successive rows and you should
receive a uniqueness constraint violation.
- Remove the tuples you entered in step 11 by highlighting the
rows (Drag down the record selector buttons on the left edge of
the table display window), then press the DELETE key. You will need
to confirm the intention to delete rows by clicking OK.
- Save each of the following delimited ASCII text versions of ALBUMS
| TRACKS and PERFORMERS
into your working directory . To bring the ALBUMS data in, press the
IMPORT button on the button bar,
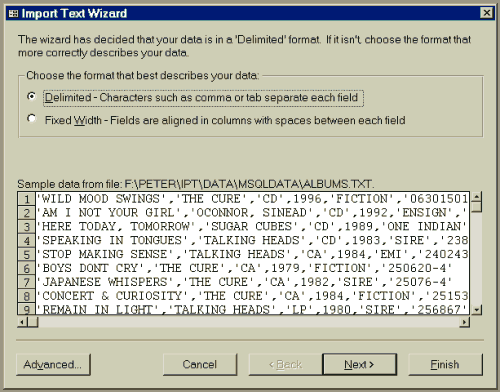
and select Text(Delimited) and then OK. Nominate the source drive
and directory and enter the filemask *.txt.
- Choose ALBUMS.TXT and press the IMPORT button.
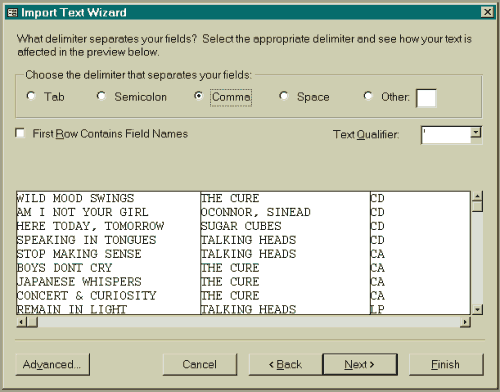
Nominate to Append to Existing Table, select ALBUMS from the droplist
as the destination and OK the choice.
- If you have the relationships and table definitions correct you
will get a REFERENTIAL INTEGRITY VIOLATION (as there is a foreign
key in TRACKS that references ALBUMS) if you attempt to do the TRACKS
before the ALBUMS - since ALBUMS is empty, this update would not be
allowed to proceed.
- Repeat step 15 above for ALBUMS first, then TRACKS and PERFORMERS.
- Close the import file selection window and return to the TABLES
database window. To view the contents of your newly instantiated
tables, double click on the required table icon.
Cascade effects can be tested by opening the ALBUMS
table, then choosing Edit from the top menu, and Select All Records
from the edit menu, then pressing the DELETE key:
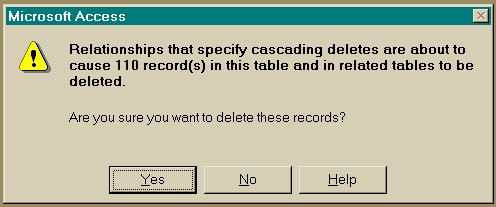
you will be presented with the informative (and alarming) news that
the current and other tables populations have been effected - I suggest
that you CANCEL (unless you wish to re-instantiate ALL 3 tables again).
|
|
|
 |
|
 |
|


