Lazarus - An Introduction to the world of Visual
Programming.
A Newbies Guide
Lazarus is one of a number of VISUAL programming environments
(others include JAVA, Visual Basic, Layout, Smalltalk, VisualWorks...).
Using these tools, it is possible to create APPLICATIONS that run in "WINDOWS" for multiple platforms
that include all of the visual appeal of a graphics rich environment,
the intuitive functionality of things like buttons and scroll bars
(things that can be activated by mouse or keyboard), that efficiently
harness system resources and encourage re-use of programming code.
In Lazarus Projects, we work with instances of OBJECTS. These
instances are uniquely identified by their NAME and have:
- TYPE - this controls how object is stored in memory what
PROPERTIES, EVENTS and METHODS are defined for the object;
- PROPERTIES - these characteristics control such things
as appearance, contents, size, name
- ASSOCIATED EVENTS - these characteristics are those 'happenings'
that the object can sense (like moving a mouse over it, clicking
in it, typing data into it...). If an object can detect an
event, it is possible to write a ection of PROGRAM CODE that
is triggered when that event is encountered (eg. when the
user clicks here, do this...). Since most events are not triggered
until the user actually does something, Lazarus programs are often
called EVENT-DRIVEN programs.
- METHODS - these are actions that the object 'knows' how
to do already (a Form object 'knows' how to 'close' itself, an Image
'knows' how to load itself from disk, a list box 'knows' how to
alphabeticalise it's contents...)
The Lazarus Screen
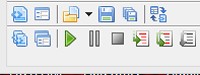
The Standard Button Bar
Included here are standard windows operations like save, new etc.
You will also notice there is a RUN button - this COMPILES
and then LAUNCHES a copy of your current project.
The Visual Component Library Button Bar
The VCL provides you with a rich palette of pre-designed objects
for you to place on the forms of your project. To place an object
on the form, simply click on the object of your choice, then click
on the form in the approximate location you want the object to 'land'.
If you want multiples of an object, press [SHIFT] while you
select the object from the VCL, then merely clicking in different
places places another of that object (a handy hint if you need lots
of buttons, say).
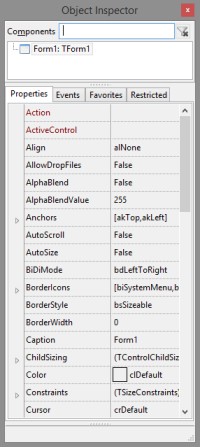
The Object Inspector
When an object is SELECTED (ie. you point to it and LEFT-CLICK
on it, producing 'pick handles' arount it's perimeter), the OBJECT
INSPECTOR displays some of the PROPERTIES for that object,
along with the VALUES that these properties are currently set
at. Some Properties (eg: in the diagram above, FONT) have SUB-PROPERTIES
indicated by a + (plus) sign next to the property name. To
open/close sub-properties, double click on the property name and the
sub-properties are either displayed or hidden.
Although there are a number of properties listed for each object,
we will see later that there are a larger selection of properties
that can be accessed (some at 'DESIGN TIME', others at 'RUNTIME')
through the use of TYPE-CASTING - we shall cover that later.
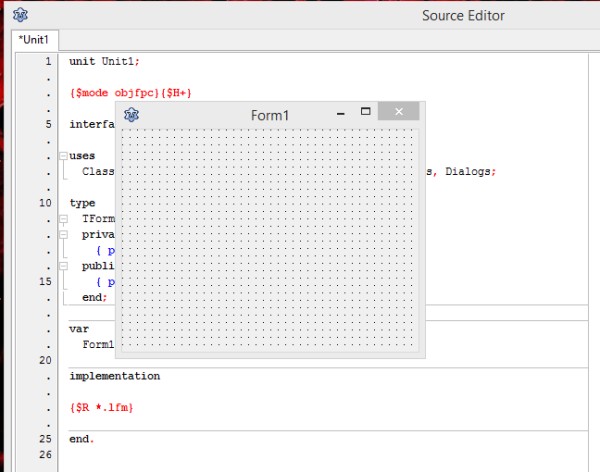
The Form and it's Unit
A Form is a WINDOW - that is, it can be visually present on
the screen when your program is running. Think of the form as a container
for objects - objects that are placed on a form are OWNED by
it (this ownership becomes important later when other forms want to
use things not 'owned' by them). The FORM and the UNIT are
intimately related - the UNIT contains all of the programming code
that controls the action of the FORM (and it's components).
For those technically minded, there is another part to a Lazarus Project
- the PROJECT file. The Project File's job is to manage the
UNIT files (whose job it is to manage the FORMS) - in a strict hierarchy
of 'parentage'.
Objects and Their Properties
Time to have a 'play'.

- Change the COLOR of your form to clPurple
- Place a LABEL on your form. Over in the object inspector,
locate the LABEL's NAME and change it to title. Change
the CAPTION of the Label to be your name. Double-click on the
FONT property of the label and change the font to ARIAL,
and change the FONT SIZE property to 50 point, change
the FONT COLOR to clYellow, then click-drag the label
into the correct position.
- Place a RADIO BUTTON on your form, change the COLOR
property to clTeal, and the FONT COLOR to clWhite.
Change the CAPTION property to read 'I like Aeroplane Jelly'
- Repeat the placement of a radio button, just below the previous
one, the font colour is set to clRed, and the caption is set
to 'I don't like Aeroplane Jelly'.
- COMPILE your project (up on the menu bar, choose project > compile) to convert your program into an executable (it also
checks for errors), then RUN it. You will notice that, although
this project doesn't do much yet, it's radio buttons at least know
how to 'behave' - try them.
To return to the 'programming environment' CLOSE the running form.
Events and Event Handlers
Different objects are 'sensitive' to different events. Most visible
objects can, for example, sense that the mouse is moving over them,
only some, however, can respond a mouse-click
- Select the LABEL you placed earlier on the form (point to it and
L-CLICK on it (putting selection handles around it's perimeter). Over
in the OBJECT INSPECTOR, bring up the EVENTS list fot your
title. Double-L-Click in the whitespace next to the ONMOUSEMOVE
event. This will 'open up' a procedure container in the unit associated
with your form, and place the cursor where it thinks you want to type
instructions. Enter the instruction close 3 spaces in from
where the cursor is placed.
- COMPILE and then RUN your program - noticing that when your caption
'senses' a mouse moving over it, the ONMOUSEMOVE event handler is
'triggered' which CLOSEs you running form.
- Select the first RADIO BUTTON you placed ont he form, over in the
OBJECT INSPECTOR go to the EVENTS associated with that RADIO BUTTON.
DOUBLE-L-CLICK on the white space next to the ONDBLCLICK event
to open up an event handler 'container' inthe unit for the form. Press
the spacebar 3 times and then type the following: Form1.color :=
clRed;
- COMPILE and then RUN your project - activate the form colour change
event handler by double clicking on the first of the radio buttons
on the running form.