1173: Scarab Amulet

I have always found ancient Egyptian symbology and art fascinating. Their attention to high graphic detail, the use of natural elements in depictions of deities, the use of gold and gemstones sublime. When I first saw the diagrams for Peter Bucan-Symons astonishing “Scarab Amulet”, I knew I needed to fold it.

From his forthcoming book “Folding Fantasy 3”, it is one of the many stand-out designs that are so terrifyingly complicated but so enticing. As part of his edit team, I also had the rare privilege of test-folding it before it has reached “the wild” as it were.

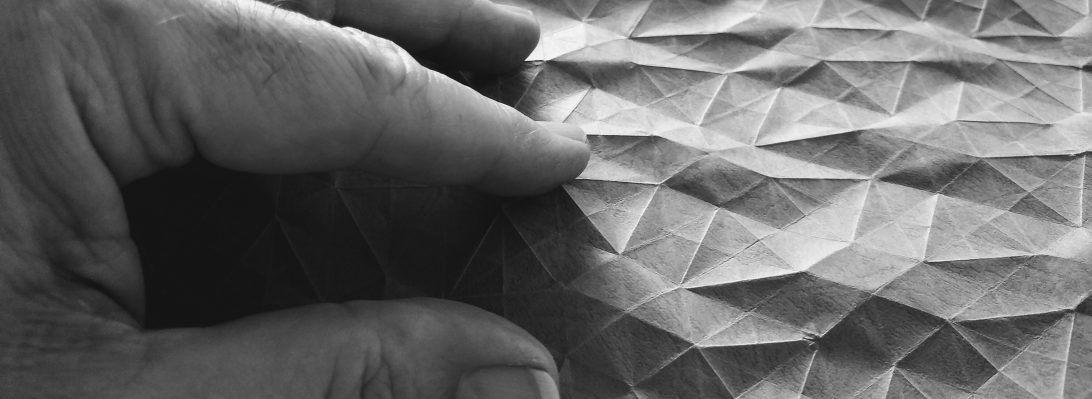
From a single 90cm square of Kraft (I keep a 90cm and a 60cm roll of Kraft in my stash all the time, they are my goto test-fold papers), via initial hex-pleat pre-creasing, we fold a many-lobed base that is then thinned, subdivided and refined to isolate, skillfully, all the necessary stickey-outey flaps in the right places.

Designing said bases is complex (at the moment beyond my feeble brain), but I like how PBS takes the time in this book to explain his methodologies, requirements and compromises for a whole bunch of the models in the book – a fantastic reference volume indeed.

Once all the flaps were isolated, the process of refining (thinning and shaping) them could begin. With so many required points, the layers really add up – managing that thickness is a real achievement. Thinner paper would help – indeed I am sure there are folders out there way more nimble fingered than me who could take it smaller, but you would need to really consider the paper choice here. Paper needs to be thin and tough (there is a LOT of sinking), it must also allow you to reverse folds cleanly (unlike a lot of laminated papers and foils that leave bunched up “kinks” when you reverse the direction of a fold).

Continue reading

Display

My annual origami display at Holland Park Library was installed this morning:

Cabinet 1 views

Included is a broad range of origami styles from a huge and diverse collection of designers, folded from a varied collection of papers.

Cabinet 2 views

I am trying to get better at not crowding the display cabinets – sometimes less is more to allow individual models to shine – let me know how I went.

If you visited, I would love your impressions, comments and suggestions for future displays.

Get directions here

Pillbugs

I first folded these little critters, designed by Robert J Lang, using a square cut from an A3 printer paper sheet back in 2011 as part of my original 365 project:

Remarkably, even with that terrible paper, all the features of the critter were present however not very refined.

Australians call these “Slaters”, but they also go under the name “wood lice” because these little isopods are found in decaying vegetation – which is why I decided they should be folded from Mango Leaf paper. It makes this fold a bit “meta” in that the critter is folded from mulberry paper that contains leaf litter.

The fold sequence is exacting, forming trapezoidal molecules for each of the 14 legs, along with antennae and a rather beautiful segmented shell. This model appears in a few of Robert’s books, I folded this one from “Origami Insects 2” – a rather splendid volume from Origami House in Japan. bought from Origami-shop (even though, strictly speaking, it is not an INSECT….).

I decided to fold two so we could see one open and one curling up into a little armoured ball – they do this when in danger.

Continue reading

1146: In flagrante delicto

The life of a male praying mantis is not all beer and skittles – inattentive and less nimble males often become a post coital snack for their partners in a brutal twist on “the circle of life”:

This is a pair of Satoshi Kamiya’s Praying Mantis, and this may well be my longest fold (in total elapsed time) to date. Two and a half years ago (the year before I had retired), I sat down with a crispy 55cm square of Kraft paper and began folding the maquette for this model (the brown one). I was stressed, it ate up an afternoon and calmed my racing brain but I got tired, lost my place and then mental fog set in and I could not for the life of me work out how to do the next step (making the little barbs on the inside of the front legs).

Determined to return to it the next day, I tucked the model into the open book I had in my book stand, put it away and … ignored it for 2.5 years. I am not sure my book “Works of Satoshi Kamiya 3” appreciated being splayed open for all that time and is now, finally, resting closed with the rest of my Origami library.

I finally had the “perfect” mantis paper – pre-coated green Unryushi tissue from Kami paper store, purchased a month or so ago when we were in Melbourne. I cut a perfect 50cm square from this deliciously thin and crisp paper and began folding. I was fired up to return to the partially finished but stalled fold and give it another go – how hard could that be?

I folded the green up to where I had stopped with the brown, then realised the next step was actually pretty simple (just not clearly diagrammed – representing such complex 3d manipulation in a series of line drawings is really hard, I know), so was able to take both the maquette and green production fold all the way to the end of an astonishing 271 step sequence.

The design is genius, and relatively efficient – interestingly there are triangle sections of paper folded away into the middle legs that is the only “waste”. Via a torturous process of isolating, crenellating and thinning the entire morphology of a lethal stick insect emerges from the tangle.

As an apex predator, the praying mantis is the perfect killing machine. Large swiveling eyes, sensitive antennae on a fully articulated head, complete with chomping mouth parts. Perfectly proportioned and armored thorax sporting 2 sets of thin legs and a pair of lethal clamp-like razor fists. Wings and a lovely plump pleated abdomen finish the features of this astonishingly complete insect – all from an UNCUT square of paper – just wow.

Continue reading