1201: Corrugated Tubiform Trefoil Knot

The internet (in this case Instagram) sometimes delivers to you by pure chance (or deliberate algorithm) inspiration that is timely:

A recent work (a square-tube based mobius strip) by Henk van der Vorst sparked a curiosity that led me to damaging a few A0 sheets of Kraft paper to explore a tubiform corrugation, and then work out something to do with it.

There is something interesting (for me, recently) in corrugations, and Henk’s work uses simple right-angle hinges, first documented by Paul Jackson, to use a large-scale fanfold without the tiresome necessity of reversing sections of the crease, and allowing you to curve that fanfold onto itself in an interesting way.

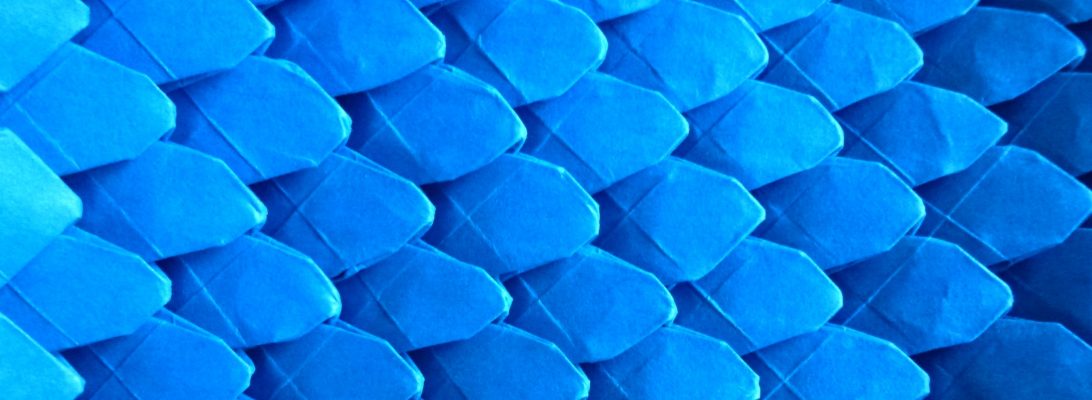
I discovered I could hinge on proportions of 6 and 3, making rectangular tubes that articulate and bend in very interesting (the kids would call it “satisfying”) ways.

I fashioned a bunch of different sizes to test the proportions and see just how small I could fold it reliably and accurately. On the large test folds I glued the seam – not sure why, but as I got smaller, the seam just seemed to keep itself shut and become invisible – especially when the tube was twisted.

A Trefoil knot is historically interesting – it is like a set of interwoven mobius strips, and originally was associated with the “Holy Trinity” : the Father, the Son, and the holy GOAT, or something similar. Renditions of it exist in historic engravings, statuary, heraldic depictions – even common images like the Girl Guide logo/symbol … thing.

Continue reading

1199: Get Knotted

As a paper folder, when someone tells you to “get knotted” … you have “options” – right?

I was playing around with offcuts – those inevitable slivers of paper you cleave off a sheet as you are squaring them and an idea struck.

I keep all my off-cuts, particularly those off beautiful papers – you never know when you might need some colour/texture. In the past I have added them to my paper pulp to add “thread-like” inclusions, and sandwiched them in-between translucent layers of wenzhou in paper mache sculptures etc.

I wanted to do something more “origami” oriented … so I tied a knot in a thin strip, and remembered that a flat knot resolves into a perfect (all things aligned and taut) pentagonal knot. If you string a few knots along the length then the strip does some pretty sculptural zig-zagging. I found I could decide the direction of the zig/zag by how I tied the knot, and that I could “graft” other strips on by simply knotting them there and hiding the extra end inside the graft knot.

I played around with Kraft paper strips to get my bearings, then added coloured accent strips of Hanji (purple, and green with acrylic ink spatter) and Kozo (red dry brushed with gold), knotted to intertwine like tendrils of an invasive weed. The original composition had a bunch more colours, but as I kept coming back to it, simpler seemed better so I gradually removed down to what you see here now. Initially I photographed it resting atop a sheet of my hand-made Kozo tissue because it looks classier like that. Should i ever decide to show/frame it I would prolly do the same. The geometry and composition is pleasing to me none the less.

It reminds me a little of the bold linework of Joan Miró, or the architectural geometry of Piet Mondrian, the fiddly intricate linework of Wassily Kandinsky, or the delicious geometry of Alexander Calder. We can all aspire to greatness I guess.

Origami “purists” will probably look down their noses at this because it is not folded from a square, contains multiple pieces and used some glue under each knot to anchor it to a sheet of olive Canson Mi-Teintes. That sort of folder snob can go get knotted 😛

1198: Shuriken Trunk

I seem drawn to corrugations lately – there is something cathartic about folding such geometry, and this one, designed by Boice Wong is very satisfying to play with:

Although the CP and demo from Boice is based on a 24 gridded square, it is possible to expand the pattern infinitely on the long axis – I decided to try it as a 2:1 rectangle and found it fairly easy to fold accurately. The collapse, although a little more exhaustive, is none the less straightforward.

This corrugation is a self-sealing “tube-like” construction that folds back on itself – I think there is a more positive lock possible, but this works fine. The base structure is a crenellated plus (+) sign, that you then shape the arms using a series of inside reverse folds.

Once collapsed, and flexed a little, it becomes deliciously bendy – you can transform it in a variety of ways, twist it tightly and then it collapses back into a compact stack form – what fun.

Continue reading

1193: Ammonite

There are many legendary folders out there and, thanks to the Interwebs, it is possible to connect with many of them via socials (and rare cases in the real world – wherever that is):

I am obsessed with the intricate sculptural pleat work of Goran Konjevod (@foldsome), and love playing in the space of densely pleated paper.

This piece, inspired by a piece from Goran, started as a 12:1 rectangle. With regular mountain divisions (1/2, 1/4…) until the creases were just over 1cm apart. I then successfully guestimated a tight and completely circular SPIRAL by pleating each mountain on the same angle, creating a lovely rosette.

Next, using a padded surface, on the reverse I scribed an irregular spiral track from centre out to edge.

Continue reading

1190: The 5-Sided Square

We are all very familiar with planar geometry – we see, for instance, a square or rectangle is a plain shape with all 4 corners being right angles (90 degrees). Curved space gets a LOT weirder:

It is possible, for instance, to construct a shape on a curved surface that has 5 (or even 6) corners, each having a right angle. Origami typically deals with sheets that start flat – a non-flat sheet affords fascinating properties.

After a conversation with Goran Konjevod (@foldsome), I wanted to try a technique he pioneered involving radially pleating such a non-Euclidean square.

Continue reading

1188: Jeremy Shafer’s “Pyramid Tessellation”

Few modern origamists are as prolific and inventive as Jeremy Shafer – he seems to be creating new models constantly, and most importantly, his designs are fun to fold:

This is his Pyramid Tessellation field – each molecule has pre-creases that have easy landmarks, meaning you could expand this field in any direction as far as you have patience for.

This version is a 4×4 field of 16 separate square-based pyramids – a lovely thing in itself but when you start playing with it it starts to do wonderfully weird things.

Using just the existing creases, the model flexes diagonally and also horizontally/vertically. When you flex it diagonally it turns in on itself and COLLAPSES down to a hexagonal stack – this initially broke my brain until I noticed the pre-creasing actually formed pyramidal faces that are equilateral triangles – the collapse then is just one state it can be arranged into.

Continue reading

1187: Russian Lilac

30 unit modulars exist in many forms, permutations and complications, few rival “Russian Lilac” for sheer time-consuming brutality:

Designed by Andrey Ermakov, this astonishing spikey ball has been quite a journey. I first added it to my “to fold” pile for a few years now, and then narrowly missed folding it as part of the IOIO (Internet Origami Olympiad) in 2021 – it was the nightmare round 2 task (I was knocked out in round 1).

The FIRST hurdle for folding this is the need to create 30 perfect regular hexagons that are all the same size (I created a few extra just in case shit went sideways). To do this, I cleaved a 2.1:1 rectangle from a 70cm wide roll of white/natural Kraft paper. Using 47 construction lines to form a regular TRIANGLE GRID on this page, I was then able to isolate 35 adjacent hexagons, which I then cut out carefully (scissors warning!!!).

Each hexagon then receives a 16 grid in all 3 axes, then 4 extra pre-creases before you begin unit folding. This totaled 1470 pre-creasing. Having bailed near the end of this year’s “Advent of Tessellations”, determined to return to it after some distance, I am not sure why i then bounced to another triangle grid on hexagon marathon project – I am guessing the time with my counsellor will eventually surface the reasons for the self-inflicted PTSD 😛

To form each unit, each hexagon then goes through 79 processes – all up each unit took me just over an hour each.

The main premise behind “2d colour-change origami” models (of which the flattened unit is one) is that you strategically utilise the edges of the sheet so you can reveal both sides of the paper along it by some clever flanges and flipping. The GENIUS of this model is that we use colour change to (when assembled) establish a colour-change triangle checkerboard across ALL outer faces of the finished polygon. Sadly each little triangle is not SEAMLESS – most are but not all, but based on my experience folding Daniel Brown’s seamless chessboards, I know this provision makes the design infinitely harder.

Continue reading

1172: Storylines

When asked to be part of the Papermakers and Artists QLD “On A Roll” Gallery exhibit, my first thoughts of a “scroll-like” object I could make was always going to be something relating to my current passion – Mulberry paper – Kozo.

I had, in previous posts, explored the harvesting and cleaning, beating and use of White Mulberry and Paper Mulberry pulp from twig to finished sheet. A consequence of processing a sheath of White mulberry was a collection of lovely white sticks without their bark. Experimenting what I could do with them, I discovered they accepted soft graphite pencil really well.

A scroll, to me, tells a story. Story telling is something that humans have always done, ever since they evolved the ability to communicate. Lots of cultures evolved oral traditions (spoken word), more developed repeatable symbology that evolved into alphabets and written communications. I was determined to explore ancient and modern story telling, with the idea that “Once upon a time” was a concept that has begun every story, in one form or another.

I began collecting different representations of the concept of “once upon a time”, and included Arabic, Burmese, Cantonese, English, Greek, Hebrew, Hindi, Japanese, Khmer, Korean, Lao, Maori, Mongolian, Nepali, Persian, Punjab, Sanskrit, Tamil, Thai, Tibetan, Urdu, Yiddish scripts that expressed this concept. Using a soft pencil, I transcribed (as faithfully as I could) these scripts, one per stick onto the twig bundle – interesting some used left to right, others right to left.

Continue reading

1171: Doomscrolling

If you have been paying attention, you would know i am a member of PAQ – Papermakers and Artists of Queensland. in 2025 we are mounting an exhibition that explores contemporary interpretations of the scroll, entitled “On a Roll”. I decided that I wanted to mount a FOLDED scroll as one of my submissions, and envisaged a massive tessellation:

I needed a theme, and a style. For a theme, I decided to try and “tell” the progression of the first year of the recent Covid-19 pandemic … because I could see a sequence of “blossoming” outbreaks that progressively “break” regular society.

The style choice was more complex – I love the aesthetic of Lacquerware – the Chinese/Japanese technique of covering simple materials in coatings of red lacquer, texture and patterns. I also wanted to have hints of “Kintsugi” – the Japanese technique of fixing broken pottery using lacquer and gold.

I chose red/natural Kraft paper because the red reminded me of the lacquer aesthetic, and the natural grounds the work in a common/everyday material. I selectively also introduced gilded elements into the finished folded work – symbolising the “patching” of the broken world – I went for a really minimal touch here, arguing less is more. Read further….

Continue reading

Just a Guy Holding a Crane

I was cleaning some cooked Paper Mulberry (Broussonetia papyrifera) bark, scraping the outer layers that was outer bark and the remnants of the dried up fleshy parts of the plant, and a thought occurred to me. The residue was really fibrous – what would paper even look like made from this waste?

Given I had the time, equipment and curiosity to fuck around and find out, I hand-beat the residue, rinsed the pulpy mess until it was clean, and then divided the ball into 3, figuring (via guestimation) that 1/3 of the blob was enough to make an A3 sheet.

I took 1/3, added it to a bucket of water and agitated it vigorously to breakup and disperse the fiber uniformly through the water. Then, using a rectangular chinese food container, I gently ladled the really watery pulp onto my new A3 Mold and Deckle, in the lid of my new vat. Taking the time to distribute the fibre evenly and thinly. When all the fiber was gone, I couched the resultant sheet onto glass, then added some smooth poly-cotton sheeting material as a layer to isolate the sheet, then added a flanellette layer, another poly-cotton sheet material layer and then repeated the sheet formation process another 2 times.

Topped off the “post” with another layer of flannelette, and a top sheet of glass. Putting this sandwich on an angle to encourage the drips onto the floor drain, I then added a besser block to add firm squishing pressure, and left it to drip overnight. I must engineer a paper press that is more consistent.

Continue reading

1158: Wilhelmina the Wyvern

Flipping through Makoto Yamaguchi’s “Origami Dragons Premium”, as one does, I stumbled across a lovely Wyvern, designed by Chuya Miyamoto:

Digging through my paper stash I found the perfect sheet for this model, a purple spotty Do paper that was part of a prize I won from Phạm Hoàng Tuấn’s Vietnamese origami paper shop pre-pandemic, so decided to give it a whirl.

My philosophy when approaching a super-complex origami design is based around “fuck around and find out” or more politely “fold until I finish or it fails”, and this model was a real treat.

A truly great design and fold sequence takes into account the material, not overly stressing it, managing accumulating layers and locking things together to keep things tidy. This design was so satisfying to fold, and in combination with the paper choice the resultant model is stunning.

Continue reading

Short-Beaked Echidna

There are only a few origami figures I MUST have in my collection – Steven Casey’s “Echidna” is one of these:

This adorable little monotreme is covered in one of my favourite square-grid tessellations, but skillfully crafted to allow all the other body bits to be where they need to.

I bought the British Origami Society booklet describing how to fold this treasure as soon as I knew it existed, and have folded it a few times now. Some sequences are nightmare fuel – this one is just so enjoyable to fold.

I recently received a shipment of paper from Origami-shop.com and in it was a 65cm 11 colour pack of the NEW Shadow Thai paper. I last bought it in 40cm square form but it was THICK so to my delight this version is thinner and takes complex folds really nicely. I chose this fur-like colour because it most closely matched the quill and hair colour of an echidna.

Continue reading

1142: Daniel Brown’s Seamless Chessboards

Having folded Steven Casey’s 8×8 40 grid seamless chessboard and singularly failing to fold Marc Kirschembaum’s 40 grid because of crease-creep inaccuracies, I was approached by Daniel Brown and asked if I was interested in his chessboards – naturally I jumped at the chance. “Seamless” chessboards are deliciously more complicated because it required each square to be represented by an un-broken surface (as opposed to being able to be comprised of bits and pieces of layers – a much easier path):

A "clusterfuck" of seamless chessboards
A “clusterfuck” of seamless chessboards

I say CHESSBOARDS because Daniel has developed a series of coloured/white alternate seamless models of LOTS of sizes, and the skills necessary to migrate edge paper towards the centre to effect colour changes is a thing that needs some work and, often, particular “widgets” (or self-contained localised fold structures).

I started with the 4×4, rather efficiently designed on a 9×9 grid ( 0.444 efficiency). I had a piece of blue-white kami, so gave it a whirl. Even dimensions require different approaches for adjacent corners as they are different colours – the same colour corner exists on the diagonal.

Continue reading

8OSME – Melbourne, July 2024

An unmissable opportunity presented itself where both OSME and Folding Australia conferences were to be hosted in Melbourne, Australia, one following the other. Having never attended an Origami conference (of any flavour) before, I jumped at the chance, but had little idea, really, what was ahead.

Diverse plenary lectures to start the days off

My wife and I got an Air BnB on Collins street for the week. Using the PT> train network, I travelled to and from Swinburne Uni for the international gatherings each day while Jo explored Melbourne Galleries and cafes.

I believed OSME stood for Origami, Science, Mathematics and Engineering – turns out the “E” was for Education, even though in this conference there were 2 Engineering strands … so, ok then. It seems the 8th iteration of this conference reflects origami/folding now so popular as an engineering concept.

A Myriad of parallel papers
Continue reading

1139: Quantum Superposition

Schrödinger’s Cat, as a thought experiment, states that if you seal a cat in a box with something that can eventually kill it, you won’t know if the cat is alive or dead until you open the box. So, until you open the box and observe the cat, the cat is simultaneously dead and alive.

We often use Schrödinger’s thought experiment to explain the concept of superposition. The experiment states that a hypothetical cat is locked in a box with some radioactive substance controlling a vial of poison. When the substance decays, it triggers a Geiger counter that causes the poison to be released, thereby killing the cat.

Since the box is locked, and we on the outside don’t know whether or not the radioactive substance has decayed and released the poison, we can’t tell if the cat is dead or alive. So, until we open the box to know for sure, the cat is both dead and alive. Mathematically speaking, there’s a 50 percent chance the cat is dead and a 50 percent chance the cat is alive. Source.

This is Sebastien Limet’s Shrodinger Square, a delicious exercise in folding a figure then hiding it inside another structure. I folded this in baking paper, and it is a little too transparent I think (I tried it in printer paper and it was too thick and opaque).

I like that the cat is made of the body and tail at opposite ends of the 5:1 sheet, closing and locking it brings the two pieces together in silhouette. Clever.