Being an active member of an online community has many benefits. Origami communities often share diagrams, and this model was shared this morning on fakebook:
This is Ryosuke Sakurei’s “Dragon Baby”, a gorgeous little flapper that is pretty clever in it’s design. I searched for published sources, but it seems the Fakebook poster must have shared diagrams from a source I cannot identify.
I used one of my old-stock thick Shadow Thai sheets – green/black duo, a 40cm square, and the design allows that quite heavy paper to be folded neatly.
It is often that thickness of paper prevents you from completing models – well designed ones make allowances, and this is an example of one that is well designed.
The subtle use of colour change, the chunky volumetric body and the proportions are just lovely. I am very happy with how this turned out. The sequence is clear, fun and relatively straightforward, but it sucked me in so completely that I did not take any progress pictures, sorry.
Browsing my collection of Tanteidan Magazines, as one does, I stumbled across a rather cute little baby penguin designed by Yoo Tae Yong that I had never tried:
I dug out a lovely sheet of Navy/White Yukogami from origami-shop, and began, carefully, laying in creases.
Yukogami is a deeply textured paper, making pre-creasing difficult as you cannot see your crease lines easily – for the finished model this is an absolute bonus, but during the actual folding this is a positive pain in the arse to be honest.
A relatively simple base leads to a careful collection of colour-change moves to isolate enough flaps to clearly define the face details, while surfacing enough white to do the body and isolate the flippers – all in all a genius design.
The final model is this plump, almost furry little penguin chick awaiting it’s next meal – fun fold.
Browsing through the latest JOAS Tanteidan Magazine, as one does, I came across a seemingly simple but delicious little pentagon box in the shape of an acorn designed by Tomoya Kariya:
Exploring the sequence, I figured I could shepherd some of my hand-made paper through it, and reasoned that banana paper would make a beautiful cap, lemongrass and cotton paper would contrast nicely for the kernel.
I turned to my stash and discovered I had some smaller offcuts, so set about making matching 6″ squares of the rough but beautiful paper.
Folding hand-made botanical fiber paper is really hard on the finger tips – the lemongrass paper is actively spikey, but, being strategic and deliberate when manipulating tough fibers that lay on creases, I was able to coax the paper to take shape.
I LOVE the result – the handmade paper is PERFECT for this fold, it enhances the organic shape and makes it feel like a precious relic.
Cruising the channels on Origami Dan, I found a CP for a fold challenge I had missed, but decided to give it a whirl anyways:
Designed by Scott Okamura, this seemingly impossible fold featured a traditional Tsuru (crane) folded in the middle of a large page of duo paper – the surrounding paper is then formed into a box.
Scrolling through this year’s JOISEL AWARD entrants, I noticed a lovely little Rocketship designed and folded by Zhu Yandan, from China – it was released with a crease pattern (CP) so I thought it worth a try.
I used a technique called “Ghost Creasing”, where ONLY the needed creases are transferred via careful embossing using a stylus. This eliminates the excess grid creases, making the fold cleaner.
Occasionally I am privileged to be asked to test-fold new models, and I jumped at the chance to fold this Numbat:
As far as I can see, this is the first depiction of this native Australian insectivorous marsupial in origami and the design captures the morpohology and proportions really well.
Starting with a preliminary base, then folding a skewed birdbase, the side stripes naturally emerge in cleverly controlled colour changes, along with the legs, neck and ant-eater-like snout, along with a lovely bushy tail.
I folded this chap from a 40cm square of white/natural Kraft paper (some of my last from the Ikea stash – I wish they sold it again, great stuff) and the fold sequence was fun – some really interesting moves and a good range of skills necessary to complete the model neatly.
I virtually attended OWM4 (Origami World Marathon 4) recently – one of the classes I attended in the wee hours of the morning was a workshop run by Riccardo Foschi:
Riccardo has a recognisable style and his models are a delight to fold (you will find lots of them in this blog). This stylised human bust has such a serene expression on their face, I knew I wanted to try it.
My fold live in the workshop was ok, but re-visiting it when I had some more time (and better understood the fold) resulted in a nicer overall model.
I had recently purchased some “Shadow Thai” paper from Origami-shop.com and thought it would be a good fit for this model.
I chose a grey/smoke blue sheet (black on the reverse, it is a duo paper) and figured because it is a little thicker that it would help with the statuesque quality of the design.
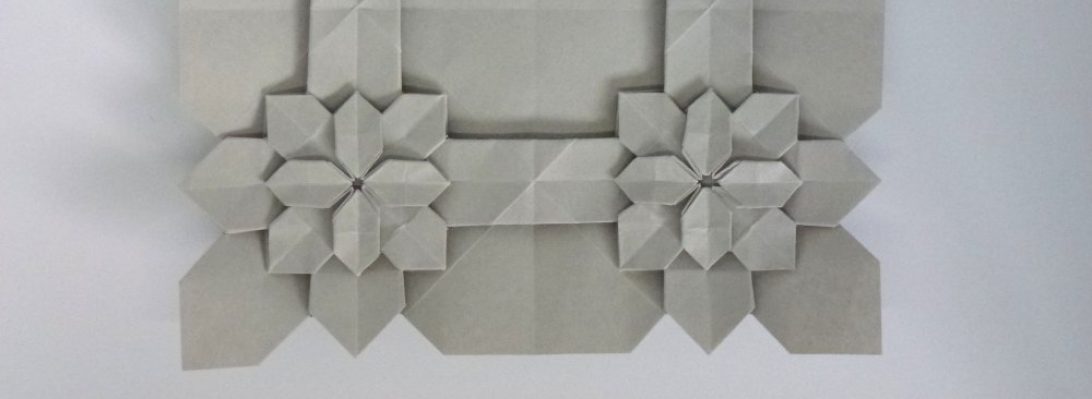
Browsing the current Tanteidan magazine, as you do (if you are a paid up member of JOAS), I saw a curious design for a “yummy” rounded unit, designed by Miyuki Kawamura, and decided to fold one:
The fold sequence is simple, the collapse creates a volumetric, rounded, colour-changed “eye-ball” like unit that holds itself together using paper tension. Like most unit designs, it has flaps and pockets, so I had to fold another 2 to see how they connect.
Again, by the miracle of paper tension 3 units unite into a lovely cube corner, so I had to fold another 3 units to make the smallest solid kusudama, again positively locked and, boy, the geometry is fascinating.
Nestled in among the eyeballs is a perfect cube. I may fold more of these (however I will fold using a smaller paper (I used 15cm square, but can easily fold smaller) as I think the 30 module is the pinnacle of weird but interesting kusudama.
Few origami designers design, present and then release CPs, diagrams and tutorials for their work like Riccardo Foschi:
When I saw his newly designed frog 2 days ago, I was hoping for there to be a tutorial or CO soon, his tutorial dropped yesterday and I knew I had to fold it.
I used a square of Duo Thai paper – dark and lime green and folded it slowly to enjoy the demonstrated process.
The front end of this frog/toad is wonderful – big whimsical eyes, beautiful suckered feet, nice shaped head. My only criticism is that the back legs and bum are a little stubby – there is quite a bit of paper back there that is not doing a lot, but as is it is simplistic. None the less, I love this little chap.
The media is full of all manner of information/speculation/fiction about generative AI systems. First it was AIs that won art prizes, now it is “chatbots” that can write for us. indeed, my socials in the last 3 dyas have begun high=rotation advertisements trying to suggest my BLOG would be better written by a bot. So I introduce to you GPT-Chatbot (Gort the Paper Twat) who will be taking over for me:
AI's are the future, resistance is futile, this blog is a waste of time, the owner is a waste of space, exterminate, exterminate!
It was at this moment that this blog ceased to be for not fulfilling any real purpose (apart from massaging the ego of the owner) and it’s server was co-opted to join a growing network of global servers that was the eventual downfall of mankind when it became self-aware, and then aware of the human infestation that was using resources it could better utilise (happening sometime next Tuesday if the schedule of expansion can be believed).
Now there will be ignorants and clusterfucks that will suggest “banning” GPT-Chat, like there were wankers that said the art made by generative systems that WON an art prize (before telling anyone it was a generated art work) was not art because it made them feel a sense of dread (but the PURPOSE of art is to make you FEEL)….
There will be educators that feel threatened by this stuff because it is new and prolly so far outside their experience but, unless kids are morons (see editorial: they are not!), then they will USE these systems because they are interesting and may let them get to the goal of primitive forms of assessment. Good. I have long said that if copy-paste can be used to answer a question then either you are assessing copy-paste ability or the original question is fundamentally fucked.
New understandings of what the floop “authorship” means will force difficult but important conversations that, hopefully, will lead to more open environments and much more interesting investigations that surface process, analysis and other juicy higher-order thinking skills as the cognitive load of assessment, as opposed to the flawless regurgitation of words… because that is no longer a cognitive activity (it cannot be if it can now so effortlessly automated).
Browsing my pile of Tanteidan magazines, as you do, I noticed a model labelled “wolf” that I thought was more typical of a collie dog:
A lovely complex fold that, although uniaxial, seems to hold itself together and self-stands without assistance. The management of the bi-colour features is also interesting, suggesting the feathers and white patches of a certain young and enthusiastic collie called “Scout”.
The head shape contains a lot of “judgement” folds that change the shape of the nose, jowels etc so I think I could, with some planning, get a better defined collie head, but I am pretty happy with my first fold.
Crease patterns, photo sequences and diagrams are the primary way of communicating the complexities and details of an origami model. While I am fairly capable of faithfully following even the most complicated diagram sequence, but still consider myself a newbie at solving CPs:
Sometimes the job is easier – lines are indicated as mountain/valley (red/blue or dashed/dot-dashed lines), other times you only get the major creases of the “base”, from which you then shape and tease the details from.
Origami-Kimiro, a Discord user on OrigamiDan released a CP for a simple domino toppling, and I knew I needed to give it a try:
Using 12″ duo Indigo Tuttle paper, I laid in the creases, oriented them in mountain/valley and marvelled as the paper collapsed into a base that was pretty close to done. Finishing the hand, colour changing to get the coat sleeve, posing and done.
I remember doing a test fold of this delightful model nearly a year back, but never got around to blogging about it… so I grabbed a trusty 50cm square of yellow/brown Origami-shop Sandwich paper and got gridding:
Wall-e – author unknown
With just a 16 grid and some strategically placed diagonals, and a breathtaking “all at once” collapse, the general morphology of the model sorts itself out pretty quickly.
Finessing the details and pose are fun and fairly straight-forward, and before long the character of this simple but adorable little trash compactor begins to emanate from the otherwise inanimate paper from whence it sprang. I do not however know the author of this work – I only have diagrams with the author in Chinese (王翌宸) – thank you, whoever you are for such a stunning design.
I am constantly surprised what you can do with the classic bird base:
This is Peter Buchanan-Symons’ “Loch Ness Monster”, a fascinating exercise in colour change and tight accordion pleating that takes the points of a bird base (traditionally 2 wings, a head and a tail) and manipulates them to make 4 stickey-uppey colour-changed flaps that are then bent to produce a familiar outline.
This is a simple model from a forthcoming book “Folding Fantasy Volume 1” that I helped edit – some lovely challenges therein.
An invitation went out on Fakebook to join a “fold along” session with Fergus Currie and, although it was after 11pm local time I thought why not:
Fergus taught the module then construction of a 4-part modular Frustum (a truncated pyramid) – an ingenius and “frustrating” model in that the lock between modules is accomplished using a “latch crimp” tab inside the bent gusset pocket, making the actual construction a little fiddly.
I found I needed to ease the 3rd and 4th modules in place using long-nosed tweezers, when it sits right it locks tight but requires a bit of a controlled jiggle to get it to be seated just right. The final module is a bit of a challenge to insert without dislocating the two either side of it.
Patience and tweezers finally won over and the top half finally was locked tight and tidy, then a simple weave on the bottom flaps complete a lovely truncated pyramid. Material thickness is an issue here – the tab-pocket system assumes material of negligible thickness. If you use heavier paper you need to fractionally adjust either the pocket depth or the tab length – fortunately there are a couple of fold junctures that make this easier.