1084: Square Spaceness

I have a huge pile of “must get around to folding this” models and “Square Spaceness” designed by Alessandra Lamio is one of this legion:

1084: Square Spaceness - plan view

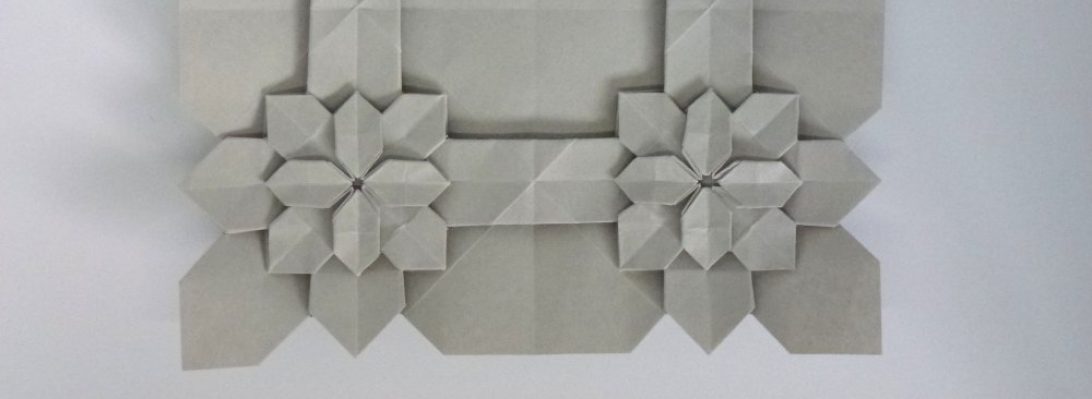
Take a square, divide it into a 16×16 grid, lay in strategic mountain and valleys and you get this almost Escher-like tessellation molecule (meaning you _could_ put multiples of these if you had a more expansive grid with some tweaks and a bit of smush).

Charged with the confidence Advent of Tess gave me, I knew it was time to give this a whirl. There are many long slight diagonal valleys that make up the bulk of the geometry for the inward sloping spirals, and the corner widget is ingenious as a lock, and adjusting the outside pleats lets it sit flat – love it.

1084: Square Spaceness - diamond view
Continue reading

1083: Bodo’s Whale

Cruising the socials, I noticed origamist Bodo Haag gifted newly drawn diagrams for a rather splendid whale, and I knew I needed to fold it:

Utilising the back and front colours of the sheet, we have a nicely white tummy and a dark back and tail fluke.

I had a lovely bit of wrapping paper (thx Rachel) and knew it would be lovely folded as something, and as a decorative ocean-going mammal it is perfect.

Continue reading

1082: Advent of Tessellations

It was late in the semester, I was looking for a folding project (to add to the other 4 already on my board – procrastigami strikes again) and noticed in my feeds a 25-day program by Madonna Yoder called “Advent of Tess”. I guess I am supposed to know about Advent, having worked in a Catholic boys school for 33 years, but… apparently it is the 25 days in December leading up to Xmas (learn something every day)

The idea was that Madonna released a CP and a video tutorial each day for 25 days, victims start with hexagons of paper pre-creased into 16-grid triangles, and collapse increasingly difficult combinations of tessellation techniques on the page.

1-5 (front/back/backlit): Cluster 6, cluster 4, cluster 6 alternating, cluster 4 alternating, HT6 closed alternating

The first few were easy, and collapsed simply, but then I decided I did not need the tutorials and proceeded to mark up the paper with the day’s CP and collapse from that. This approach came awry pretty quickly as the elements began to argue for the same real estate on the sheet and I learned that sequential development was way more sustainable.

The folds started with closed triangle twists (something I had done a lot of previously, so found accurate placement of these fairly easy. We later progressed to “open” triangle twists, which are much harder, and require a “setup” that uses paper tension to define the lines off-grid that were the sides of the triangle.

6-10 (front/back/backlit): Triangle double-bar wells, shrinking violet, studded wheels, radiant, dancing ribbons

We then progressed to closed hexagon twists (again, something I had done lots of beforehand) and refined them into “open” hexagon twists – a fascinating variation of a “star puff” of which I had passing familiarity.

Continue reading
Bitter Sweet

As I approached the date of my retirement, I genuinely struggled with how I could sum up my work-life, and how was going to say thankyou, personally, to so many people I have loved working with.

Collapsed blooms get shaped

It occurred to me that Origami could be my savior, and something hand-made and precious was the order of the day, so set about making Naomiki Sato’s pentagonal “Hybrid Tea” roses – in my opinion the zenith of his glorious rose designs. From a pentagon, with some skill, you sculpt a spiraling bloom of some 25 petals – genius as it is folds only – no cuts, no glue. Originally I was going to present them stemmed, but re-worked the idea to have them sit on calyxes instead.

I gave myself 3 weeks, and it turned out that was not really enough time, as each bloom from go to woe takes just over an hour – even when batch folding. It was a labour of love, and I got it done, and resulted in an amazing coincidence. I listed the recipients, and it totaled 33 – this number corresponded to the number of years I have been working at this current school – it was clearly meant to be.

Exacting pre-creasing

Acquiring paper, cutting perfect pentagons, calculating the relative size different between flower and calyx was the first task. I found if I cut the largest pentagon I could from an A3 sheet for the bloom, then the corresponding largest pentagon from an A4 sheet was perfect for the calyx.

Production-line techniques then ensued – precise pre-creases, pre-collapse wrangling and locating landmarks for secondary petal separation all have to be done first, and at this scale it is fiddly folding, and you need about 7 fingers on all of 3 of your hands. Once the dissected spiral collapse is complete the really hard part starts – shaping the petals to be soft curls in staggered cascades – quite a knack.

Continue reading

1081: l’escargot

I was doodling with a scrap of 2×1 note paper and arrived at what I think might be an original model:

le escargot

This little snail has a volumetric shell and body, along with some lovely poseable eye stalks.

le escargot views

Originality in Origami is tricksey, as most models recycle techniques from other folds, and the head/eye end uses a fairly standard waterbomb-accordion sink, but I cannot remember seeing it used in this way.

The shell is formed initially by outside reverse-folding the body and as such offers a colour change opportunity if folded with bi-colour paper.

I made a video tutorial if you want to fold it, or read further for a set of photo diagrams.

Continue reading