429: Satoshi Kamiya’s Lyrebird

You may have guessed I am a bit of a fanboi when it comes to the works of Satoshi  Kamiya:

As previously stated, my wife and I spent some time in a rainforest cabin and that inspired me to have a go at his Lyrbird – a deliciously complicated crumple that needs to result in a characteristic fan tail, 2 side tail things, wings, legs, body and head.

Continue reading

427: Geiger’s Xenomorph

Anyone who knows me realises I am a huge fan of the Alien movies, the first one is, for me, close to perfect science fiction horror:

I had been aware of Kade Chan’s Alien design for ages, had the crease pattern and wrestled many times trying to make it with no luck. I had relegated this to the “give up on it” pile – there are a few that have just beaten me for the moment.

Kade posted a near complete video tutorial, suddenly this model was back on the radar. The video is pretty clear – you should have a go – it is NOT a beginners model but the techniques for forming the main features are pretty clear.

So I set about a test fold, in Litho paper – the paper gave up half way through, splitting on most major creases, but I learned the basic collapse and some of the featuring before it gave up so resolved to fold it with something more durable.

I cut a 55cm square of Kraft paper off the roll and, very carefully, began folding. This, like most models, relies on accuracy for things to work out – a part of a mm out here and it compounds when you do accordion pleating, and this model has so many layers because of the amount of the sheet that is hidden.

I like that most surfaces provide layers that you can then texture in the modelling, sculpting them in graded steps to create carapace, armour and small beautiful details like the rib cage and prehensile tail.

The alien as envisaged by the movie franchise took on shape and general morphology from the host it bursts through the chest of – this one is fairly certainly humanoid and so posing it I found myself anthropomorphising its stance a little. I used a little MC to ensure the pose was rigid, clamped details in place until the paper was dry, then mounted him on a textured circular base and am quite chuffed with the result.

This was WTF (What’s That Fold) #2 – stay tuned for more paper bending

426: Satoshi’s Tree Frog

The Weekly WTF#1 (what’s that fold) had to be a Satoshi model, and I had been itching to make this little beauty ever since I was aware he had designed one:

Initially, I folded this with a odd end of a kraft roll, starting with a nearly 40cm square (nearly in that I discovered it was not quite square), but found it very small for my fat clumsy fingers.

I resolved to fold it neater, so went larger – second fold (the one pictured) is a 60cm square of brown Kraft paper (no, it is not green, and I know of no easy way to make it so).

There is a LOT to like about this model, and some concerns – some of the steps are fairly poorly explained (given the nature of some of the manoeuvres I can not imagine how that would be improved) and some of the folding is through so many layers that without help this model does NOT stay as folded.

I decided to do wet-folding, with a little MC (methyl cellulose) to fold, mould and let it dry before moving on – this lengthened the time to make the model, but in the end made it most beautiful. Some of the subtle shaping would ONLY be achievable with foil-core paper or via wet MC folding.

In the end, this is the most frog-like thing I have encountered that was not actually a frog. the details are astonishing even to me (and I wrangled them out of a flat, uncut square).

“Can I go for a swim Mum?”.
“No, you just ate that fly, wait a half an hour
or you will get stomach cramps junior!” .
“Aww mum, that is an old toad’s tale.”

I ended up with 2 – my first fold, whilst smaller is different to the larger one, they both have interesting postures and attitudes and I am torn as to which one I prefer.

I am sure I will fold this one again – he is so cute, but I think I will wait until I have suitable thin green paper – the model is so well designed that it’s tummy is one colour, rest of the body is the other – so I will be hunting paper that is 2 shades of green front to back (or perhaps making a bit of double tissue – we shall see).

WTF (What’s That Fold) #1

As a weekly treat, I am starting a WTF competition (What’s That Fold?) that can net the successful guesser the model if they want it.

If the model is to be posted, I just ask your assistance with the postage, that is as complicated as it needs to be.

WTF WEEK 1: Precreasing done, any guessers?

Continue reading

425: Dancing Crane

I first saw a pair of these lovely things, folded in white, clearly dancing to impress each other and put it on my list of must try models by Robert Lang:

A lazy afternoon over the Christmas break, I took a 60cm sq or brown Kraft paper and, over cups of tea, mince pies and chats with my mum, I bent this bird.

This model is everything to do with implied movement and pose, sadly the paper made a limp, lifeless bird and so it crystallised my resolve to try Methyl Cellulose to stiffen the model, allowing me to pose outstretched wings and wobbly backwards knees.

The result is lovely – not sure how I feel about models that require either foil-cored paper or wire armatures or chemical sizes/stiffeners to achieve a presentable figure but I like this one a lot. I made a simple florist wire stand, briefly toyed with (then promptly dismissed) the idea of making it’s pair.

There is much technique to like in this model – as usual, Lang has beautifully convoluted and torturous geometric ways of getting rid of huge amounts of paper to reveal a fairly accurate morphology.

Gifted to Helena, as a symbol of hope, courage and speedy recovery – kindest regards.

MC by any other name

A tool in many origamist’s toolbox is a goopy substance called “Methyl Cellulose” (MC) – it is a chemical that is used as a size (keeps paper crisp/stiff), gelling agent (it is the stuff that makes KY Jelly so slimy – no kids, that is NOT a new aeroplane flavour) and there is even a food grade MC used in cooking (although I think only the Japanese truly like the slimy textures it produces).

I have had enormous difficulty finding this stuff – Oxylades (a local art shop) ordered some stuff, turned out to be Ethyl Cellulose which is not PH neutral and will, eventually discolour and degrade, taking whatever is coated with it.

Digging through my cupboards, as you do, I chanced upon a tub of powdered adhesive goop that we used to use to make finger paint for the kids when they were little tackers. A tiny amount dissolved in warm water makes the most delightful goopy gel-like liquid (that we used to add powdered pigment to to make the best finger paint in the world).

Educational Colours “Mix-A-Paste”, it seems, is Methyl Cellulose – we had some in the house for over 20 years and I did not realise – *Face Palm*

Origamists use it to re-stiffen paper, laminate it with other paper (double tissue is something I must now try), pose models and so on and it was not really until the last 2 models I folded that I realised the appearance of the model would be improved if it did NOT splay open – a common problem with very dense folds and domestic (non tissue-foil) papers.

Up until now, I have been creasing, then while the creases were sharp spraying the models with a clear, matt, lacquer – this at least prevents the folds from unfurling due to humidity but does little to tidy many layers and dense seams.

The last time I tried a bird similar – the Great Egret – when I say similar, the legs and neck/head were similar – very dense, lots of wrangling resulting in limp, broken joints and an un-poseable mess in the end.  The model was relegated to the bin as it almost entirely failed to stand up or stay together. I suspect I could have “saved” the model with MC.

I will let it dry, see how it turns out – I dislike models that do not look after themselves – ie need assistance to stay together, I steer clear of models that are generally not possible with all but specialist papers – the foil cored tissue foil is something I have yet to use – lots of models work only if the folds you place stay folded.

424: Rudolph the Roosevelt Elk

Looking for something festive, inspired by “Robbie the Reindeer” on the telly, I decided to fold this challenging model by Robert Lang:

Masterpiece of design, I had to measure 13 landmarks (by scaling measurements based on 70ths) and then I folded triangles subdividing the surface, using those landmarks as vertices. Then you bisect every angle in each triangle and that gives you the folds for the base.

After a collapse from hell, and some clever manipulation. accordion folds and sinks to raise the points on the antlers, some shaping and a good measure of swearing, you end up with this magnificent beast.

I love Lang models for all sorts of reasons, not the least of which is that you can “feel” the mathematics in many of his folds. This one was certainly designed using his computer program “treemaker”, and is embodied proof that with a little care it is possible to imagine and design anything of arbitrary complexity in origami.

A glass headed pin to complete the nose and we have Rudolph, then not so much a reindeer as an elk (apparently they are touchy about this – who knew?)

This beautiful model completed my tree setting, bringing in the festive cheer for the family gathering – I hope it found you with similar good will to all mankind.

423: A Diskworld

Sir Terry Pratchett, one of my favourite authors, imagined a world like no other, a “disk” world, held aloft on the back of 4 gigantic elephants, standing on the back of a giant star turtle called “Great A’ Tuin”:

The breadth of imagination, depth of character, intricacy of story arc and obvious love he lavishes on his books are an amazing legacy. Everyone who is a fan starts somewhere – for me, it was the book “Mort” but there are dozens, each clever, funny and beautifully written.

When presented with such a lovely TURTLE it seemed only natural to attepmt to pay homage to a literary favourite of mine, so set about assembling the component bits. It was as if the stars had aligned, having just folded ELEPHANTS I set about making 4 of them, only to realise they were too big and so made 4 smaller ones.

The disk was paper craft – a circle of cardboard, MAP of Diskworld on top, covered with paper, toilet roll holder cut to be support and bracket that elephants could rest on and a balance for the pitched back of the turtle – voila.

I am quite chuffed with the end result – partly because it matches the image I had in my head, partly because it works as a whole, and is able to be dismantled to boggle and the component parts as well.

I posted photos on terry Pratchett’s Facebook page, I hope he sees them – I hope the model brings his even a small amount of the joy his writings have brought me.

422: Loggerhead Turtle

When our kids were little tackers, we went on a summer holiday to Mon Repos, North Queensland, to see the turtles laying and hatching:

During the night, exhausted loggerhead, green and leatherback turtles haul themselves out of the surf, up the beach, gig holes and lay eggs – on the same beach they, themselves hatched from years earlier.

When I first saw this turtle, I assumes it MUST have been papercraft – you know, glue, cuts – very neat but none the less it could NOT be a single bit of paper.

Browsing my JOAS Tanteidan Convention books, to me delight, I stumbled across Satoshi Kamiya’s instructions (HUNDREDS of them) for the turtle (not sure what version) and knew I had to give it a try.

The shell corrugation/tesselation alone is a masterpiece, but then you wrap the unused paper around and inside (forming an internal support for the shell to keep it peaked) and form flippers and a lovely head.

I am so thrilled with this, my first fold – I am itching to fold it again, but cannot for the moment justify the nearly 8 hours necessary, to then have 2 turtles in the house.  I cannot imagine folding it smaller – I have seen it tiny but I am not sure my fat clumsy fingers would let me achieve it as so many of the shaping manoeuvres are millimetre precise when folded from a 60cm sq.

I love this model, it takes pride of place in my paper shrine. I have resisted the urge to tape it up solid, as it holds it’s form without assistance – genius design.

…what can one do with a turtle I ask?

421: Asiatic Elephant

I have folded a few elephants – most concentrate on the head and ignore the rest of the animal – not so this little beauty:

This model has much solidity about it. It looks like it has bulk yet uses little paper to do this, an interesting haunch locking mechanism and a tight little bottom (ahem).

Taken from Works of Satoshi Kamiya Volume 2, this is the most elephantine figure I have yet folded and uses some lovely techniques to use the paper very efficiently, yet result in a free-standing, locked model.

The hind quarters, particularly, are well formed, with a cutesy tail and toe nails and all – very nice Mr Kamiya.

I think this model would work on a much bigger scale – maybe when a sufficiently large sheet avails itself I might give it a go.

I am enjoying working up to some of the more challenging folds in this book – some are just plain bewildering to me at the moment but that confusion too shall pass eventually I hope.

419: Green Tree Snake Form

I was leafing through my latest Tanteidan Magazing (Japan Origami Society journal) and came across a layer management exercise by Hideo Komatsu:

Having bought a pack of 2-colour (different colour front and back) paper, some green/brown, I was looking for something to try it out on.

This is slightly complicated, but ends up looking a little like a little snake curling back on itself a couple of times – layer management and colour changes mean the snake and it’s background are fairly distinct.

Hideo has many other models, I like the strong style, heavy abstraction and interesting sheet management evident in his work (having a few in the 365+ collection already) – I must track down more of his work.

418: Kamiya’s Golden Retriever

As soon as I knew Satoshi was due to release a new book, I knew I had to have it:

This is the first fold of my first model from “The Works of Satoshi Kamiya 2”, and it is quite recognisably a Golden retriever/labrador. 

For anyone who has been blessed with a lab in their life, you realise how wonderfully gentle, soppy, stupid and plain lovely they are.

This model is dedicated to the memory of “Missy” and “Raffy” – two much missed pets (one of my in-laws, the other a mates family pet).

I love how this model is demonstrative of form without necessarily capturing every detail. The fold technique is odd, but interesting and each time I wrangle the head/shoulders, you get a slightly different aspect, expression and posture – lovely use of a sheet.

I used lithography paper for this, but have also folded it with a piece of double-sided kami, with good results.  I think I like the white fold, however sandy/buff would be more demonstrative of the actual dog’s colour.

This is the first, of a series, taken from this wonderful book – some serious challenges ahead – bring it on!

416: Dark Rider

Round the corner came a black horse, no hobbit-pony but a full-sized horse; and on it sat a large man, who seemed to crouch in the saddle, wrapped in a great black cloak and hood, so that only his boots in the high stirrups showed below; his face was shadowed and invisible.
“When it reached the tree and was level with Frodo the horse stopped. The riding figure sat quite still with its head bowed, as if listening. From inside the hood came a noise as of someone sniffing to catch an elusive scent; the head turned from side to side of the road.” – “Three is Company,” Fellowship of the Ring, p. 84

I hate it when things beat me – I find it really hard to let it go:

On my FOURTH attempt, I managed to fold Jason Ku’s amazing model of a Dark Rider (version 8.1) – another character/thing from Lord of the Rings. This is getting to be a habit but is part of the build up to the release of the first part of “The Hobbit”, and I am a bit of a fan.

This fold took me an age (about 6 hours of actual folding) – determined to be accurate, take my time and complete each step as neatly as I could, this strategy paid off through stonkingly complicated twists, crimps and spread-squashes as you coax a square of paper into a possessed horse with a robed rider.

I am particularly proud of the hands/gauntlets – my variation on Jason Ku’s design, I think it looks better. there is so much to see in this model that it is difficult to photograph it and do it justice.

A huge piece of Kraft paper (60cm square) results in a decent sized model (14cm at its tallest) with amazing detail. My only criticism I guess is the flimsiness of the front legs – completely unable to support the bulk of paper above.

I mounted this model on a simple wire armature, so it can stand – he sinisterly looks like he is reaching for something (the one ring, naturally) and I like that the robes look full but are empty.

I masterpiece in design, there were many times I just had to walk away, unable to fathom what the next step meant or how I was going to achieve it. Kraft paper is remarkably forgiving and there was nearly no paper fatigue near the end. Not sure how you could actually fold this model with thicker paper as the centre gets very dense and shaping requires you to wrangle upwards of 20 layers.

I am totally chuffed to have achieved this, my first successful fold after so many failures – one I even had the paper disintegrate in my hands due to fatigue. I found myself having to look forward to how the manoeuvre looks when done to work out some of the ore complex swivels, reverses and open sinks.

As awesome as this model is, this design is NOT a beginners model – the instructions need interpretation as many steps require many new folds to happen at the same time (some without reference).  Indeed I look at my first successful attempt and notice a bunch of things I will do differently next time I fold it.

No idea what I will do with this model, but I am pleased I can now mentally tick this one off in my folders bucket list.

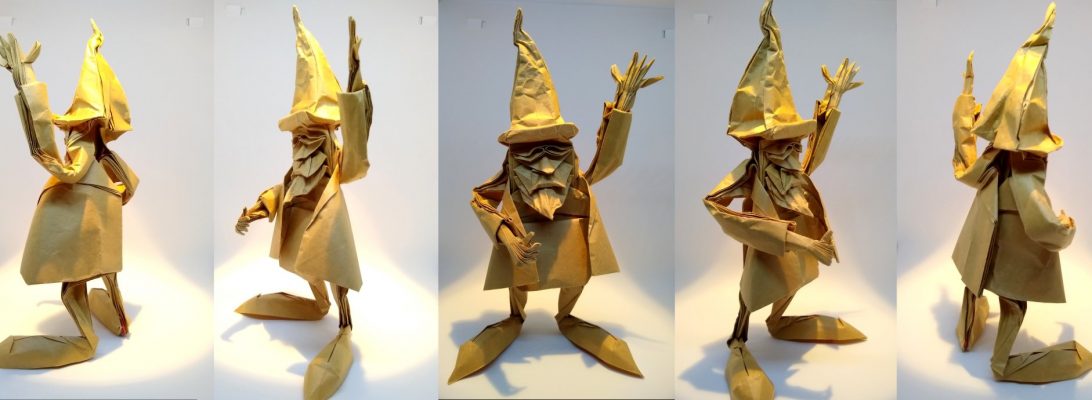
415: Smaug the Golden

I have been looking for a nice dragon, you know, in celebration of the forthcoming release of “The Hobbit” (being a bit of a fan):

I saw a coloured/cut version of this dragon on Deviantart and thought it worth trying, turns out it is a WIP from Tadashi Mori, who released a video of how to fold it so I was away.

It reminds me a little of the “Ancient Dragon” by Satoshi Kamiya, but is much easier to fold and is a lot less brutal to the paper.

I can see huge modelling potential for this dragon, Tadashi calls it a “darkness Dragon” and I hope he is continuing the development of the model. I added knees, claws and modified the wings slightly so they stay out in display.

I like the tail and general morphology of this dragon – the central body length (betwixt fore and aft legs is a little compact, neck a little long and hind legs a little bunched but it is a nice fold none the less.

I am very happy with this as a first fold, and will probably fold it again. I used 55cm square Kraft paper and it seemed to hold up pretty well.

Soooo … who would like this little beauty? He needs a home, is only a little bit bitey but 100% dragon (well, 74% dragon, 26% paper, but with imagination…)

edit: smaug long since found a home, sorry

413: Satoshi’s Minotaur

Determined to try something harder, I had flagged satoshi Kamiya’s Minotaur a “must try eventually”:

I also wanted to try my new “envelopener” – an ingenius paper cutter from The Origami Shop that splits a page on a crease – being frustrated at not being able to cut a straight edge easily on large format paper.

This lovely mythical beast is part man part bull but Satoshi takes this to a new level, making the man beastly as well.

So much paper is worked here, starting with nearly a metre square, the resultant model is barely 15cm tall and so dense in places that detailing was very difficult. I love the expression of his face, the arms and hands, hooves and fantastic tail.

Such innovative use of the sheet, you do not realise that the arms end up being about 30+ layers thick. I have seen this model folded by others and it was standing – mine, made from 35GSM brown Kraft paper does not (without the assistance of a wider armature stand I made for him)

As a first fold, I am very pleased with how he turned out – I might fold him again, one day, as I learned a lot from this fold.